Understanding Bleed: Why Print Shops Ask for It on Your Documents
In the world of printing, precision is key. Whether you're creating business cards, flyers, or brochures, achieving a polished and professional look requires attention to detail. One crucial aspect of this detail is bleed—an often-requested requirement by print shops that can leave many customers scratching their heads. So, why exactly do print shops ask for bleed on documents? Let's delve into the intricacies of this printing essential.
What is Bleed?
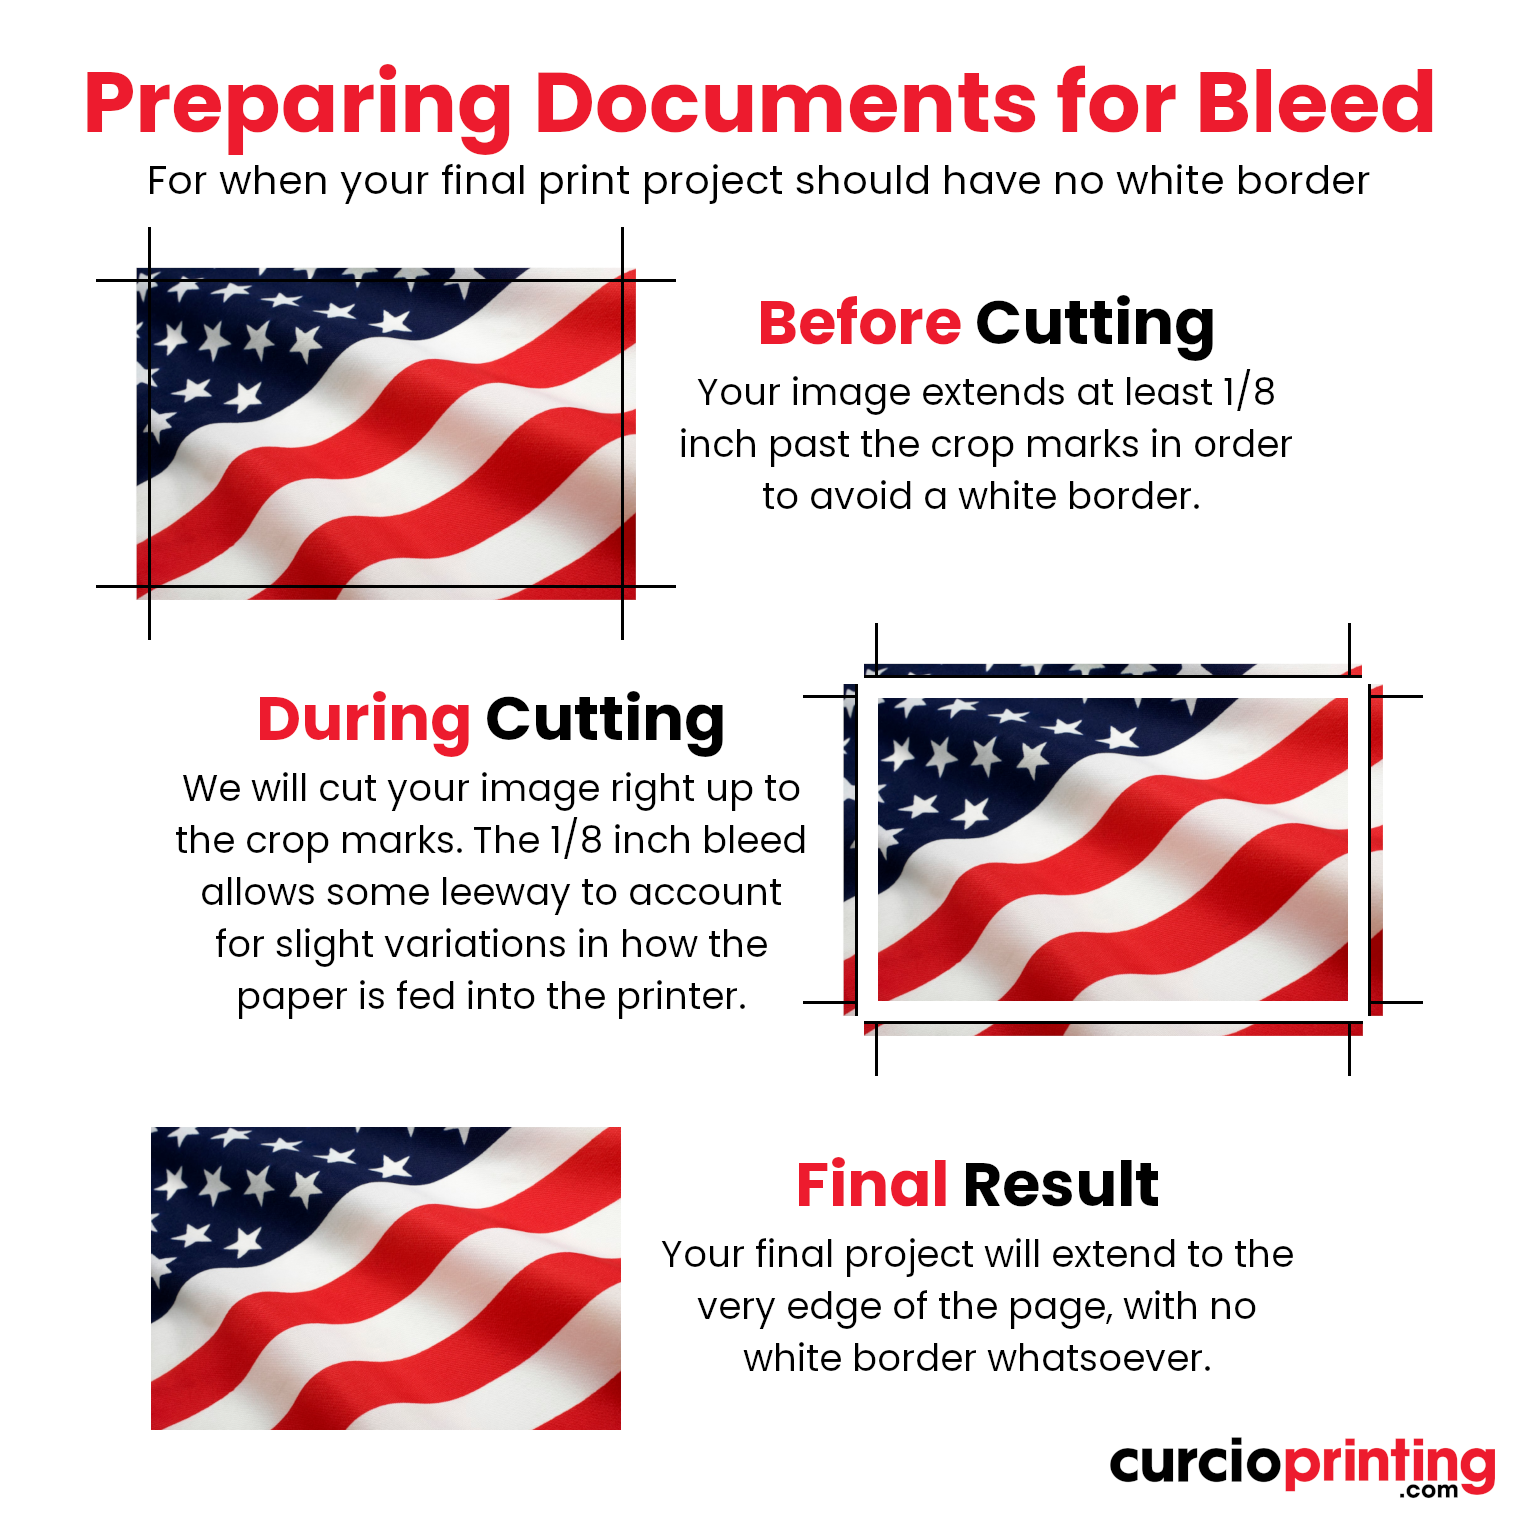
Bleed is a printing term that refers to the area of a document that extends beyond the final trim size. It's the margin of safety, so to speak, that ensures your design prints all the way to the edge of the paper without leaving any unsightly borders or gaps.
The Importance of Bleed
At first glance, bleed might seem like an unnecessary addition to your design process. However, its importance becomes apparent during the printing and finishing stages.
1. Precision Trimming
Printers operate with incredible accuracy, but even the slightest misalignment can result in noticeable imperfections in the final product. Bleed provides a buffer zone, allowing printers to trim the document precisely without risking white borders or unfinished edges.
2. Minimizing Margins of Error
Print runs involve various processes, from printing to cutting and finishing. Each step introduces the potential for slight shifts or discrepancies. By including bleed, you minimize the margin of error, ensuring that your design looks as intended when it's in your hands.
3. Professional Presentation
Imagine receiving a stack of business cards or flyers, only to find that each one has uneven edges or white gaps along the borders. Such inconsistencies can detract from the professionalism of your materials. Bleed helps maintain a consistent and polished appearance across all printed pieces.
How to Prepare Documents with Bleed
Now that we understand the importance of bleed, let's explore how to incorporate it into your design process effectively.
1. Extend Design Elements
When creating your document, ensure that background colors, images, and other design elements extend into the bleed area. This guarantees that there are no white borders once the document is trimmed. Bleed is typically 1/8 of an inch beyond the crop marks.
2. Check Print Shop Specifications
Different print shops may have varying requirements for bleed size. It's essential to consult with your print shop or check their guidelines to ensure that your document meets their specifications.
3. Use Design Software
Most professional design software, such as Adobe Photoshop, Illustrator, or InDesign, allows you to set up documents with bleed easily. Utilize these features to ensure your design is print-ready.
In the world of printing, attention to detail can make all the difference. Bleed might seem like a minor aspect of the design process, but its significance cannot be overstated. By providing a margin of safety and ensuring precise trimming, bleed plays a crucial role in delivering professional-looking printed materials. So, the next time your print shop requests bleed on your documents, you'll understand why it's an essential step in the printing process.
To learn more, check out our how-to video.

